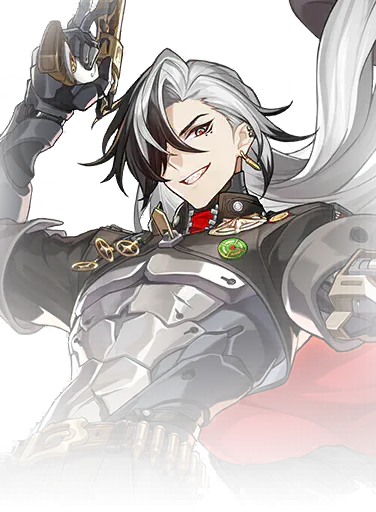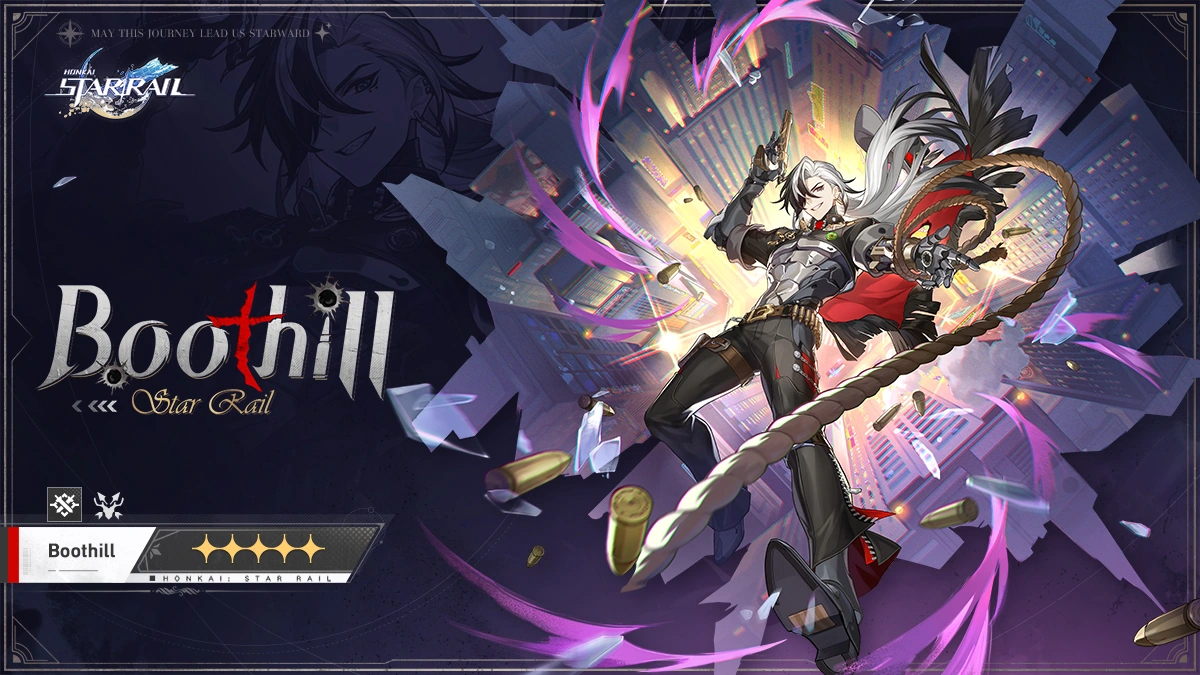
Nhân vật Boothill

Boothill

HuntPhysical5★
Last updated: 08/04/2026

“So, here’s the thing: someone went and tinkered with my Synesthesia Beacon, so now every time you muddle-fudgers hear me chinwaggin’ with those shirtbags, it’s all a bunch of “fudge this” and “fork that…” See what I’m sayin’?”

Should You Pull for Boothill?

Main DPS

Boothill is a Break DPS who hits one target extremely hard. His Skill pulls a single enemy into a Standoff, he shreds their Toughness over and over, and once they are Broken he keeps dealing Break DMG every turn. He can also apply Physical Weakness on his own and his Traces make him easy to build, so he is well worth pulling if you want a dedicated boss killer.

A great fit if you are short on DPS characters, since Boothill barely cares which elements a fight asks for. If you mainly need someone to clear lots of enemies at once, think twice, because he focuses on a single target.

Memory of Chaos Very strong Standoff lets him take down single bosses quickly, though almost his whole kit hits only one target.
Pure Fiction Weak Boothill mostly hits one target, and he only deals extra Break DMG to adjacent enemies at E6.
Apocalyptic Shadow Strong His Ultimate applies Physical Weakness to the boss, so he can handle any boss that cannot lock its Toughness bar.
Pros & Cons

Pros

  • Excellent single-target break DPS
  • Enormous Toughness damage per turn
  • Can implant a Physical Weakness on enemies with his Ultimate and Technique
  • Depends less on ATK and CRIT stats, so he can be built defensively
  • Built-in action delay that improves survivability and can even let the team run without a sustain unit
  • Has plenty of good and easily obtainable teammates

Cons

  • Takes a little time to stack up Pocket Trickshot
  • The alternatives to his signature Light Cone all come with big conditions
  • Struggles against enemies that can lock their Toughness bar

Best Boothill Build Guide

Best Boothill Build

Most of Boothill's damage is Break DMG, so the stats that matter most are Break Effect and SPD, not ATK or CRIT. His signature Light Cone is far ahead of everything else, so if you don't have it, pick from the options below.

Best Light Cones

  • 1 Shadowed by Night Shadowed by Night Great
    Boothill's best 4-star Light Cone. It gives Break Effect plus a SPD boost when entering combat or dealing Break DMG, which are exactly the two things he wants. It only comes from banners, so it may take a while to get, but even a single copy at Superimposition 1 already beats every option below.
  • 2 Adversarial Adversarial Good
    A 3-star Light Cone that is genuinely worth it when used well: defeating an enemy gives him 18% SPD (at Superimposition 5). Boothill hardly cares about base ATK or any offensive buff other than Break Effect, which is why this cone can compete. The catch is that the buff can drop off in boss fights, and with Bronya on the team you need to tune his SPD around it.
  • 3 River Flows in Spring River Flows in Spring Good
    An alternative to Adversarial that needs Boothill to avoid taking damage, which is not easy because his Skill Taunts the enemy. Pair it with a shielder and it works more consistently than Adversarial, which also makes team building and SPD tuning easier.
  • 4 Swordplay Swordplay Good
    Increases his DMG when he keeps attacking the same enemy. Most of its buffs do nothing for Break DMG, though, which is where the bulk of his damage comes from.
  • 5 Cruising in the Stellar Sea Cruising in the Stellar Sea Good
    Gives CRIT Rate and an ATK boost. That doesn't help his Break DMG, but it still adds damage to his Enhanced Basic ATK and Ultimate.

Best Relics

1
The best set. It gives Break Effect, and once he has enough Break Effect, his Break DMG ignores part of the enemy's DEF. It gets even better when Trailblazer (Harmony) is on the team.
2
The second choice. It gives 32% Break Effect, which directly raises his Break DMG, and also restores a bit of Energy after he inflicts Weakness Break.
3
A 2+2 combo for a raw Break Effect boost. It is easier to build because you are not locked into one 4-piece set. If you can't put together 4 pieces with good stats yet, you can also run 2 pieces of Iron Cavalry Against the Scourge with 2 pieces of Thief of Shooting Meteor or Messenger Traversing Hackerspace.

Best Planar Ornaments

1
The best Ornament set. It gives a lot of Break Effect, and even more once he reaches 145 SPD. Boothill has high base stats and a lot of freedom in how you roll his stats, so hitting that number is not hard.
2
Use this if you can't reach 145 SPD for Talia. It is weaker because its DMG boost doesn't apply to Break DMG.
3
A good pick when you are fighting Fire-weak enemies.

Main Stats

  • BodyCRIT Rate or CRIT DMG
  • FeetSPD
  • Planar SpherePhysical DMG Boost
  • Link RopeBreak Effect

Substats

  • 1SPD (up to your target)
  • 2Break Effect
  • 3CRIT Rate
  • 4CRIT DMG

SPD on Feet and Break Effect on the Link Rope are the two fixed slots. Body and Planar Sphere matter much less: go CRIT Rate or CRIT DMG on Body and Physical DMG Boost on the Sphere, but if you don't have those yet, any main stat will do for now.

SPD and Break Effect are by far the most important substats: reach the SPD you are aiming for, then stack as much Break Effect as you can. You only need a moderate amount of CRIT because Ghost Load adds CRIT based on his Break Effect. For example, with 200% Break Effect, just 55% CRIT Rate from gear and zero CRIT DMG substats already gives him 75% CRIT Rate and 150% CRIT DMG.

Stat Targets

  • Break Effectat least 200%, 260% to 340% with great gear
  • SPD145 (135 is okay), or 160 or 200 if you can go higher
  • CRIT Rate40% to 55% or more (out of combat)
  • CRIT DMG50% or more (out of combat)
  • HP2900 to 3200

Skill Priority

Talent > Skill > Ultimate > Basic ATK

His Talent raises his Break DMG, so max it first. Leveling the Skill increases the DMG the enemy takes during Standoff, and leveling the Ultimate makes its action delay longer. Leave Basic ATK for last, since it scales off ATK and does almost nothing for his Break DMG.

Trace Priority

Unlock all three: Ghost Load, Above Snakes, Point Blank

Ghost Load gives CRIT Rate and CRIT DMG based on his Break Effect (up to 30% and 150%), which makes him much easier to build. Point Blank regenerates 10 Energy each time he gains Pocket Trickshot while in Standoff, so his Ultimate comes back faster. Above Snakes reduces the DMG he takes from enemies outside the Standoff by 30% while he is in a Standoff, which helps him stay alive. All three are very good, so unlock them as early as you can.

Eidolon Priority

E1 and E2 are the best value

E1 gives him 1 stack of Pocket Trickshot at the start of battle and lets him ignore 16% of the enemy's DEF whenever he deals DMG. E2 recovers 1 Skill Point and increases his Break Effect by 30% for 2 turns when he gains Pocket Trickshot while in Standoff. E4 makes the enemy in the Standoff take 12% more DMG from him and offsets the extra DMG he takes from that enemy by 12%. E6 makes his Talent deal extra Break DMG to the main target and to adjacent enemies, which makes Boothill usable when there are several enemies.

Best Boothill Teams

Best Break Team

Replace Sunday with: Bronya, Sparkle Replace Lingsha with: Gallagher

Break teammates feed Boothill extra Break Effect, and more Break Effect means more damage. Sunday gives him extra actions and Energy so he can fire Enhanced Basic ATKs back to back and build Pocket Trickshot faster; keep Sunday 1 or 2 SPD slower than Boothill. Ruan Mei gives a ton of Break Effect plus RES PEN, and Lingsha's healing scales with Break Effect. The Dahlia, Pela, Silver Wolf or Asta can also take one of the support slots. Sparkle's Action Advance is not 100%, so she can mess up Boothill's turn order.

Fugue and The Dahlia Team

Replace Lingsha with: Gallagher

Fugue and The Dahlia give Boothill Super Break DMG on top of the Break DMG he already deals, and they add more Break Effect too. Fugue also lets him handle enemies that are not weak to Physical without relying on his Ultimate. Lingsha is the best healer here because she also scales with Break Effect.

Budget Team (All 4-Stars)

Trailblazer (Harmony) gives him more Break Effect and extra Super Break DMG, exactly what Boothill wants. Asta's ATK buff doesn't do much for him, but her SPD buff gets him more turns. Natasha handles healing and cleansing, and any other easy-to-get healer works in her place.

Triple Support Team with Fugue and The Dahlia

Replace Ruan Mei with: Trailblazer (Harmony)

This team drops the healer for one more support. The action delay on his Ultimate helps Boothill survive, so you can sometimes get away without a healer, and since he relies less on ATK and CRIT, you can build him a little more defensively.

Best Teammates for Boothill

Fugue
Fugue

With Fugue, Boothill can gain all 3 Pocket Trickshot stacks in a single attack: 1 from the normal Break, 1 from breaking the extra 40% Toughness bar, and 1 from the kill. Each target gets Broken twice instead of once, so his Weakness Break DMG doubles.

The Dahlia
The Dahlia

Gives Weakness Break Efficiency, around 100% Break Effect, 18% DEF shred and extra Super Break DMG. When Boothill applies Physical Weakness, he gets 30% SPD for 2 turns, although this buff won't always be active.

Ruan Mei
Ruan Mei

Gives everything Boothill likes: Weakness Break Efficiency, Break Effect, RES PEN, and DEF shred if she is at E1.

Sunday
Sunday

Gives extra actions and Energy so Boothill builds Pocket Trickshot faster. If you have Sunday, use him over Bronya.

Bronya
Bronya

Her Skill gives DMG buffs and an extra action, which cuts down Boothill's ramp-up time. Keep her 1 SPD slower than him.

Trailblazer (Harmony)

Adds Break Effect and extra Super Break DMG, and makes Iron Cavalry Against the Scourge even stronger.

Lingsha
Lingsha

A healer who scales with Break Effect, and the best healing choice for the Fugue and The Dahlia team.

Gallagher
Gallagher

He heals based on his Break Effect, and his Ultimate puts the Besotted debuff on enemies, which makes them take more Break DMG.

Pela
Pela

Her DEF reduction hits several enemies at once, and Boothill's Break DMG benefits from it.

Silver Wolf
Silver Wolf

Her Ultimate brings a big DEF reduction, and she piles on plenty of other debuffs too.

How to Play Boothill

Skill Starts the Standoff

His Skill Sizzlin' Tango forces Boothill and one enemy into a Standoff for 2 of his turns. That enemy is Taunted and takes more DMG, and Boothill's Basic ATK becomes Enhanced. The Skill gives no Energy, but it doesn't end his turn either, so you can attack right after using it. The Enhanced Basic ATK costs no Skill Points, which makes Boothill easier on Skill Points than most DPS characters.

Stacking Pocket Trickshot

When the enemy in the Standoff is defeated or Weakness Broken, Boothill gains 1 stack of Pocket Trickshot and the Standoff ends. If he Breaks and defeats the enemy in the same action, he gains 2 stacks. Each stack increases the Toughness Reduction of his Enhanced Basic ATK by 50%, up to 3 stacks. He keeps Pocket Trickshot for the next battle after winning, so once he has ramped up, he stays ramped up.

Hitting Enemies After They Break

His Talent Five Peas in a Pod is the heart of his kit: if the target is Weakness Broken when he uses his Enhanced Basic ATK, he deals extra Break DMG, and more Pocket Trickshot stacks mean a bigger hit. The enemy only has to be Broken during that action, even on the very last hit. It also doesn't require the enemy to be weak to Physical, so he can still blow up enemies that his teammates Broke.

Applying Physical Weakness Himself

His Ultimate Dust Devil's Sunset Rodeo applies Physical Weakness to one enemy for 2 turns, deals heavy damage and delays its action. The Weakness is guaranteed and needs no Effect Hit Rate. The Ultimate costs only 115 Energy and Boothill gains a lot of Energy, so if he is fast enough, he can keep Physical Weakness on the main target almost the whole fight. His Technique 3-9× Smile does the same to the first enemy he uses his Skill on in the next battle, lasting 2 turns. The only enemies he really struggles with are those that can lock their Toughness bar.

Quick Tips

  • Use his Technique before the fight so his first Skill applies Physical Weakness right away, letting him build Pocket Trickshot even before his Ultimate is ready.
  • His Ultimate is not limited by the Taunt, so use it to apply Physical Weakness to the next enemy while you finish off the current one.
  • Keep Sunday or Bronya 1 SPD slower than Boothill so he can act back to back.
  • With The Dahlia on the team, use Boothill's Ultimate during his own turn so the SPD buff lasts longer.
  • Don't rush to level his Basic ATK; spend your materials on his Talent first.

Boothill Skills

Basic ATK

Skullcrush Spurs

[Single Target]
Energy Generated20
Toughness Break Single Target: 10

Deals Physical DMG equal to 140% of Boothill’s ATK to one designated enemy target.

Lv. 10

Upgrade Materials

Lv. 1 to Lv. 10

Sizzlin' Tango

[Impair]
Energy Generated30

Forces Boothill and one designated enemy target into the “Standoff” state. Boothill’s Basic ATK gets Enhanced, and he cannot use his Skill, lasting for 2 turn(s). This duration decreases by 1 at the start of Boothill’s every turn.
The enemy target in the “Standoff” becomes Taunted. When this enemy target/Boothill gets attacked by the other party in the Standoff, the DMG they receive increases by 38%/15%.
After this target is defeated or becomes Weakness Broken, Boothill gains 1 stack of “Pocket Trickshot,” then dispels the “Standoff.”
This Skill cannot regenerate Energy. After using this Skill, the current turn does not end.

Lv. 15

Upgrade Materials

Lv. 1 to Lv. 15

Dust Devil's Sunset Rodeo

[Single Target]
Energy Generated5
Toughness Break Single Target: 30

Applies Physical Weakness to one designated enemy target, lasting for 2 turn(s).
Deals Physical DMG equal to 480% of Boothill’s ATK to the target and delays their action by 45%.

Lv. 15

Upgrade Materials

Lv. 1 to Lv. 15

Five Peas in a Pod

[Enhance]
Energy Generated5

Each stack of Pocket Trickshot increases the Enhanced Basic Attack’s Toughness Reduction by 50%, stacking up to 3 time(s).
If the target is Weakness Broken while the Enhanced Basic ATK is being used, based on the number of Pocket Trickshot stacks, deals Break DMG to this target equal to 88%/150%/213% of Boothill’s Physical Break DMG. The max Toughness taken into account for this DMG cannot exceed 16 times the base Toughness Reduction of the Basic Attack “Skullcrush Spurs.”
After winning the battle, Boothill can retain Pocket Trickshot for the next battle.

Lv. 15

Upgrade Materials

Lv. 1 to Lv. 15

3-9× Smile

Energy Generated20

After the Technique is used, when casting the Skill for the first time in the next battle, applies the same Physical Weakness to the target as the one induced by the Ultimate, lasting for 2 turn(s).

Boothill Traces

Total Trace Bonuses
  • Hiệu Suất Toughness Break +37.3%
  • ATK % +18%
  • HP % +10%

Boothill Eidolons

Dusty Trail's Lone Star
Eidolon 1

When the battle starts, obtains 1 stack of Pocket Trickshot. When Boothill deals DMG, ignores 16% of the enemy target’s DEF.

Milestonemonger
Eidolon 2

When in Standoff and gaining Pocket Trickshot, recovers 1 Skill Point(s) and increases Break Effect by 30%, lasting for 2 turn(s). Can also trigger this effect when gaining Pocket Trickshot stacks that exceed the max limit. But cannot trigger repeatedly within one turn.

Marble Orchard's Guard
Eidolon 3

Ultimate Lv. +2, up to a maximum of Lv. 15.
Basic ATK Lv. +1, up to a maximum of Lv. 10.

Cold Cuts Chef
Eidolon 4

When the enemy target in the Standoff is attacked by Boothill, the DMG they receive additionally increases by 12%. When Boothill is attacked by the enemy target in the Standoff, the effect of him receiving increased DMG is offset by 12%.

Stump Speech
Eidolon 5

Skill Lv. +2, up to a maximum of Lv. 15.
Talent Lv. +2, up to a maximum of Lv. 15.

Crowbar Hotel's Raccoon
Eidolon 6

When triggering the Talent’s Break DMG, additionally deals Break DMG to the target equal to 40% of the original DMG multiplier and additionally deals Break DMG to adjacent targets equal to 70% of the original DMG multiplier.

Stats Base

Lv. 80
  • HP Base—
  • ATK Base—
  • DEF Base—
  • SPD—
  • Taunt—

Ascension Materials

20304050607080

About Boothill

Species
Human
Path story
The Hunt
World
Cosmic
Signature Light Cone
Sailing Towards a Second Life
Debut Banner
Dusty Trail's Lone Star
Release Date
2024-05-29
Version
introduced in 2.0, playable from 2.2

Faction

  • Galaxy Rangers

Relatives

  • Gray (adoptive mother)
  • Nick (adoptive father)
  • Unnamed adoptive daughter
EN Andrew Russell
CN Peng Bo (彭博)
JP Konishi Katsuyuki (小西克幸)
KR Kim Dan (김단)

Playstyle overview

Boothill is a damage dealer who specializes in dueling enemies. While a Standoff is running, Boothill gains powerful abilities, and winning the Standoff grants him a buff that carries over. Boothill’s Ultimate and Technique can also add a Physical Weakness to enemies.

Boothill FAQ

Is Boothill worth pulling?
Yes, if you want a very strong single-target DPS, especially for bosses. He can apply Physical Weakness himself, so he doesn't care much about enemy elements, which makes him a great pick if you are short on DPS. He does well against single bosses in Memory of Chaos and Apocalyptic Shadow, but struggles in Pure Fiction because he hits mostly one target.
Does Boothill need a lot of CRIT?
Not much. Ghost Load adds CRIT based on his Break Effect, and this bonus maxes out at 300% Break Effect. You only need about 40% to 55% CRIT Rate and 50% or more CRIT DMG (out of combat), then put everything else into Break Effect and SPD.
What Light Cone should Boothill use without his signature?
Shadowed by Night is the best 4-star option. If you don't have it, the 3-star Adversarial works well since defeating enemies gives him SPD, or River Flows in Spring if your team has a shielder. Swordplay and Cruising in the Stellar Sea are also usable.
Can Boothill fight enemies that are not weak to Physical?
Yes, except enemies that can lock their Toughness bar. His Ultimate and Technique apply Physical Weakness with no chance to miss. On top of that, his Talent deals Break DMG to Weakness Broken enemies without needing them to be weak to Physical.
Which Eidolon should I stop at?
E1 and E2 are the best value: E1 ignores 16% of the enemy's DEF, and E2 adds Break Effect and recovers Skill Points. If you want him to hit adjacent enemies too, you need E6.